什么是抽象语法树?
一个**抽象语法树(AST (韩语))**是源代码结构的树形表示。树上的每个节点都表示源代码中发生的一个构造。abstract表示它不代表真实语法的每一个细节(如分号或括号)但专注于结构上和语义上的内容。
AST对于现代JavaScript工具如何工作至关重要:
- Linters(例如ESLint)- 分析错误和样式违规的代码
- 格式化器(例如 Pretier)- reformat 代码一致
- Transpillers(例如 Babel)- 将现代JS转换为反向兼容的版本。
- Bundlers(例如Webpack, Rollup)- 分析依赖性和优化代码
- 代码mods- 自动化大型代码重构
为什么在正则表达式上使用 AST ?
虽然regex可以做简单的文本替换,但AST提供:
- 结构理解- 确切知道每个代码代表什么
- 可靠性- 处理边界情况,嵌套结构,以及复杂的语法
- 精度-只转换您的意图,避免虚假匹配
- 维护性- 更容易理解和扩展变换
现实世界实际使用案例
我有权重构一个名为arco. design的开源组件库的演示文稿。 遗留的演示文稿用ReactDOM.render和magic container variable来挂载组件,但我想把它们转换成自成一体的和语法完全的功能元件,在现代框架中可以很容易地渲染。在这种arco- design reforceive republic request中,有上百个这样的演示文稿文件,因此手动操作会很乏力,容易出错。 使用 AST 转换,我可可靠而高效地自动化这个重构件。我将一步步走过这个 AST 转换的整个过程 。
在之前
// Legacy demo code using ReactDOM.render with magic container variable
import { Button, Space } from '@arco-design/web-react'

ReactDOM.render(
  <Space size="large">
    <Button type="primary">Primary</Button>
    <Button type="secondary">Secondary</Button>
    <Button type="dashed">Dashed</Button>
    <Button type="outline">Outline</Button>
    <Button type="text">Text</Button>
  </Space>,
  // Magic variable representing the mount point
  CONTAINER
)
****之后
// Self-contained functional component with export
import { Button, Space } from '@arco-design/web-react'

const App = () => {
  return (
    <Space size="large">
      <Button type="primary">Primary</Button>
      <Button type="secondary">Secondary</Button>
      <Button type="dashed">Dashed</Button>
      <Button type="outline">Outline</Button>
      <Button type="text">Text</Button>
    </Space>
  )
}

export default App
逐步建立AST转型
将转化过程分解为可消化步骤。
Babel 工作流程图
source code
  -> @babel/parser: parse to AST
AST
  -> @babel/traverse: find + transform nodes
modified AST
  -> @babel/generator: generate code from modified AST
target code
安装依赖关系
首先,安装所需的软件包:
npm install @babel/parser @babel/traverse @babel/generator
这三个一揽子方案共同发挥作用:
@babel/parser- 将代码字符串转换为 AST@babel/traverse-通过并修改 AST@babel/generator- 将 AST 转换为代码
**注:**这些例子使用JavaScript.对于TypeScript代码转换,使用
@babel/parser与typescript插件,或者直接使用TypeScript编译器API.
第1步:将代码解析为 AST
将源代码字符串转换成结构化的树形表示。
const babelParser = require('@babel/parser')

const code = `
import { Button, Space } from '@arco-design/web-react';

ReactDOM.render(
  <Space size="large">
    <Button type="primary">Primary</Button>
    <Button type="secondary">Secondary</Button>
    <Button type="dashed">Dashed</Button>
    <Button type="outline">Outline</Button>
    <Button type="text">Text</Button>
  </Space>,
  CONTAINER
);
`

const ast = babelParser.parse(code, {
  sourceType: 'module', // Enable ES6 imports/exports
  plugins: ['jsx'], // Enable JSX syntax parsing
})
解析器读取代码并创建 AST,每个 JavaScript 构造(进口、函数调用、JSX)成为节点。我们指定sourceType: 'module'支持ES6进口并添加jsx用于解析 React 的 JSX 语法的插件。
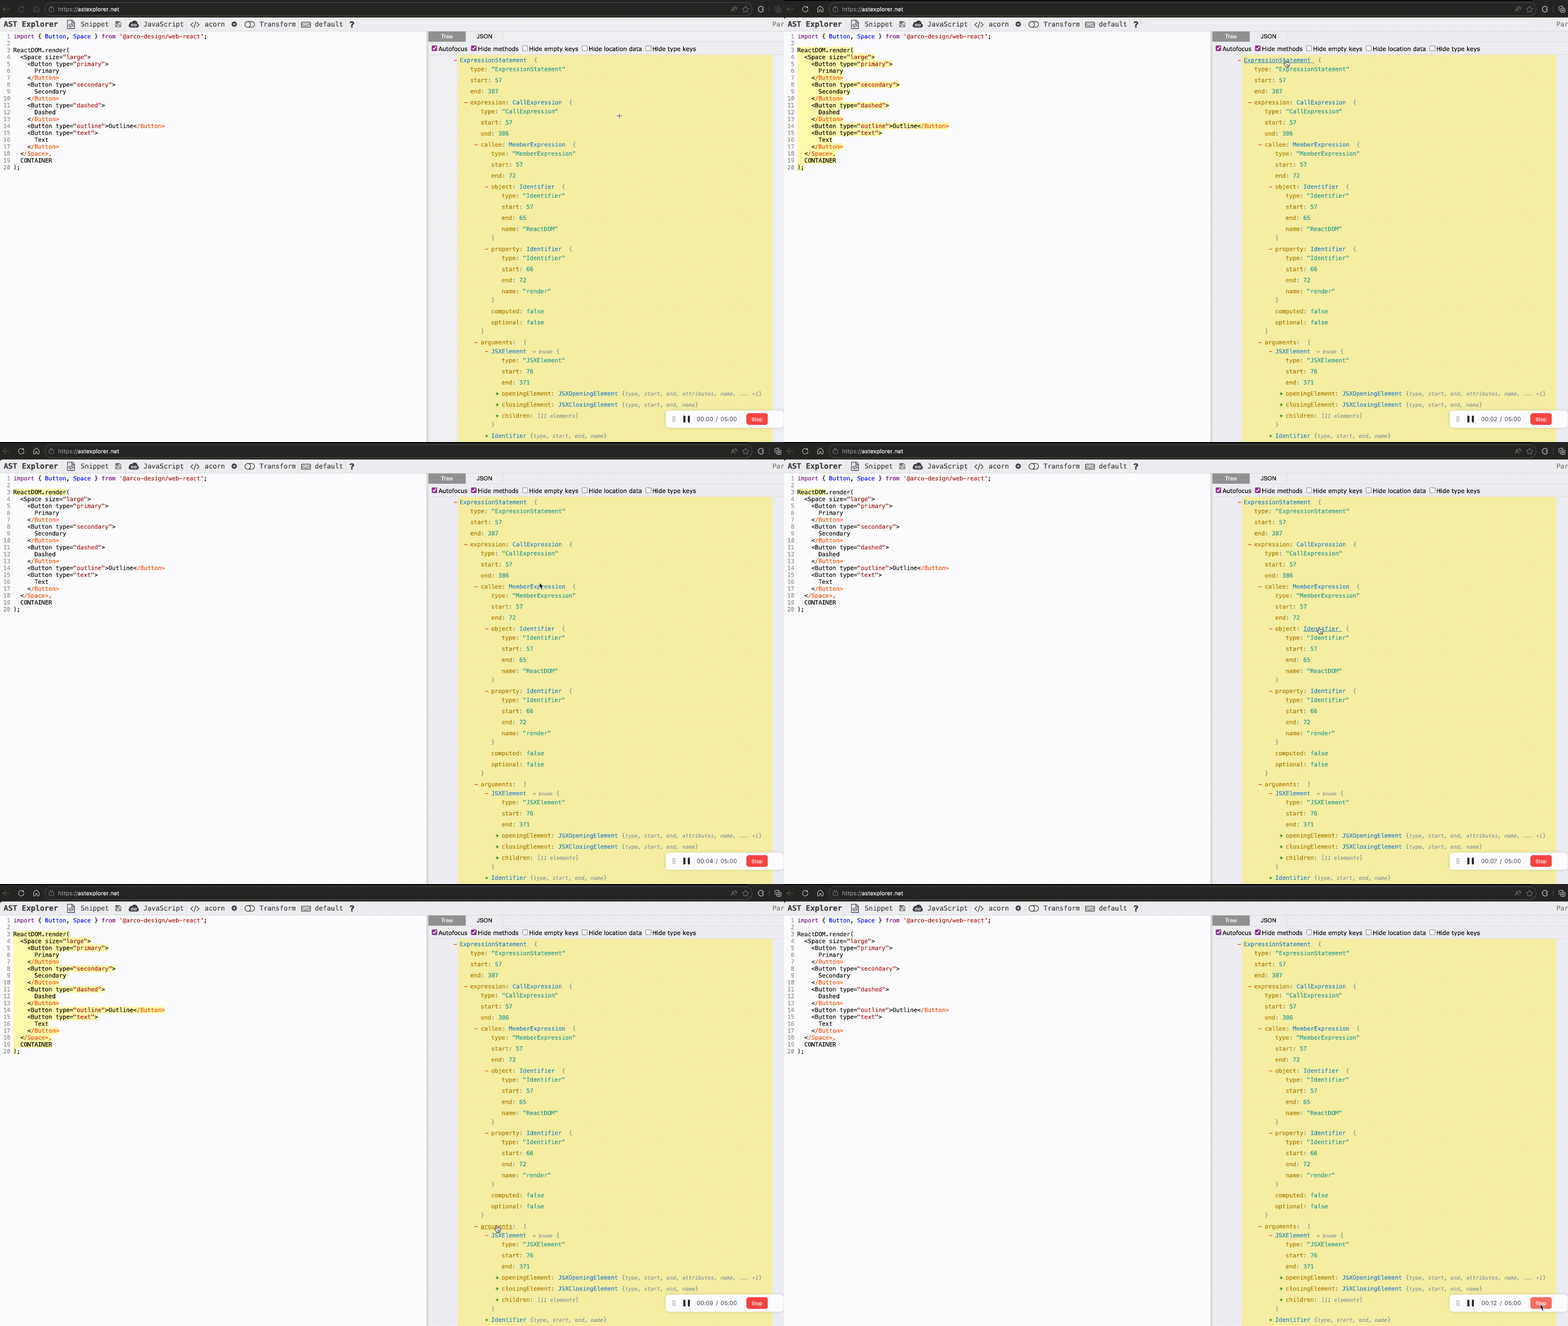
为了在写入变换前更好地理解代码如何翻译为AST节点,我们可以使用AST Explorer在视觉上探索AST的结构:
- 访问(原始内容存档于2018-09-29). astexplorer.net
- 在编辑器中粘贴您的代码
- 见现场AST影像
- 绕过节点查看其类型和属性
第2步:确定目标模式
在AST中找到目标ReactDOM.render()呼叫。
const traverse = require('@babel/traverse').default

traverse(ast, {
  CallExpression(path) {
    // This visitor runs for every function call in the code
    // Check if this is ReactDOM.render()
    const isReactDOMRender =
      path.get('callee').isMemberExpression() &&
      path.get('callee.object').isIdentifier({ name: 'ReactDOM' }) &&
      path.get('callee.property').isIdentifier({ name: 'render' })

    if (isReactDOMRender) {
      console.log('Found ReactDOM.render call!')
      // We'll transform it in the next steps
    }
  },
})
traverse使用访问者模式行走AST. OurCallExpression访问者检查每个函数呼叫,我们检查是否是MemberExpression(类似obj.method)的东西,其中对象为ReactDOM,财产为render.
步骤3:提取JSX要素
让JSX传到ReactDOM.render()
traverse(ast, {
  CallExpression(path) {
    if (/* ...same checks as above... */) {
      // ReactDOM.render takes the JSX as its first argument
      const jsxElement = path.get('arguments.0').node
      /**
       * Get the first argument of the call expression, which is the JSX element.
       * path.get('arguments.0') navigates to the first argument of the function call
       * .node retrieves the actual AST node representing the JSX element.
       */
      console.log('JSX element type:', jsxElement.type) // JSXElement
    }
  }
})
ReactDOM.render()需要两个论点:JSX制造和DOM容器。path.get('arguments.0')访问第一个参数(联合来文十),以及.node以获得实际的 AST 节点。
步骤4:创建功能组件 AST
为const App = () => { return <JSX> }建立 AST 节点 。
const componentName = 'App'

const component = {
  type: 'VariableDeclaration', // const ...
  kind: 'const',
  declarations: [
    {
      type: 'VariableDeclarator', // App = ...
      id: {
        type: 'Identifier',
        name: componentName,
      },
      init: {
        type: 'ArrowFunctionExpression', // () => { ... }
        params: [],
        body: {
          type: 'BlockStatement', // { ... }
          body: [
            {
              type: 'ReturnStatement', // return ...
              argument: jsxElement, // JSX we extracted earlier at step 3
            },
          ],
        },
      },
    },
  ],
}
我们正在手动构建一个功能组件的 AST 结构。每个 JavaScript 构造都有相应的 AST 节点类型 :
VariableDeclaration为constVariableDeclarator任务ArrowFunctionExpression箭头函数BlockStatement卷曲支架- 返回时的
ReturnStatement
步骤 5: 创建导出语句
为export default App建造 AST 。
const exportDefault = {
  type: 'ExportDefaultDeclaration',
  declaration: {
    type: 'Identifier',
    name: componentName,
  },
}
一个ExportDefaultDeclaration节点代表export default.它的declaration字段指我们出口的东西——在这种情况下,一个Identifier引用了我们的组件名称。
步骤6:修改程序
删除旧代码并添加我们的新组件 。
traverse(ast, {
  CallExpression(path) {
    if (/* ...ReactDOM.render checks... */) {
      // Get the root Program node
      const program = path.findParent((p) => p.isProgram())

      // Remove the ReactDOM.render() call
      path.remove()

      // Add the new component in step 4
      program.node.body.push(component)
      // Add the export statement in step 5
      program.node.body.push(exportDefault)
    }
  }
})
我们航行到Program节点(AST 词根)中,删除ReactDOM.render()从树上打电话,然后将我们的新组件和导出声明附加到程序正文中。
步骤 7: 生成已转换的代码
将修改后的 AST 转换为 JavaScript 代码 。
const generator = require('@babel/generator').default

const output = generator(ast, {}, code)
console.log(output.code)
@babel/generator穿过 AST 并转换每个节点返回源代码。它处理格式化,尽管它可能不完全匹配原始 。
输出:
import { Button, Space } from '@arco-design/web-react'

const App = () => {
  return (
    <Space size="large">
      <Button type="primary">Primary</Button>
      <Button type="secondary">Secondary</Button>
      <Button type="dashed">Dashed</Button>
      <Button type="outline">Outline</Button>
      <Button type="text">Text</Button>
    </Space>
  )
}

export default App
完全解决方案
现在,我们了解每个步骤,这里是一个完整的转变 在一个一致的脚本:
const babelParser = require('@babel/parser')
const traverse = require('@babel/traverse').default
const generator = require('@babel/generator').default

const code = `
import { Button, Space } from '@arco-design/web-react';

ReactDOM.render(
  <Space size="large">
    <Button type="primary">Primary</Button>
    <Button type="secondary">Secondary</Button>
    <Button type="dashed">Dashed</Button>
    <Button type="outline">Outline</Button>
    <Button type="text">Text</Button>
  </Space>,
  CONTAINER
);
`

// Parse the code into an AST
const ast = babelParser.parse(code, {
  sourceType: 'module',
  plugins: ['jsx'],
})

// Transform the AST
traverse(ast, {
  CallExpression(path) {
    // Find ReactDOM.render() calls
    if (
      path.get('callee').isMemberExpression() &&
      path.get('callee.object').isIdentifier({ name: 'ReactDOM' }) &&
      path.get('callee.property').isIdentifier({ name: 'render' })
    ) {
      const componentName = 'App'
      const jsxElement = path.get('arguments.0').node

      // Create functional component: const App = () => { return <JSX> }
      const component = {
        type: 'VariableDeclaration',
        kind: 'const',
        declarations: [
          {
            type: 'VariableDeclarator',
            id: { type: 'Identifier', name: componentName },
            init: {
              type: 'ArrowFunctionExpression',
              params: [],
              body: {
                type: 'BlockStatement',
                body: [
                  {
                    type: 'ReturnStatement',
                    argument: jsxElement,
                  },
                ],
              },
            },
          },
        ],
      }

      // Create export: export default App
      const exportDefault = {
        type: 'ExportDefaultDeclaration',
        declaration: { type: 'Identifier', name: componentName },
      }

      // Modify the program
      const program = path.findParent((p) => p.isProgram())
      path.remove()
      program.node.body.push(component)
      program.node.body.push(exportDefault)
    }
  },
})

// Generate transformed code
const output = generator(ast, {}, code)
console.log(output.code)
常见的 AST 节点类型参考
在与 JavaScript ASTs 合作时,你会经常遇到这些节点类型:
| 节点类型 | 代表 | 示例 |
|---|---|---|
Program | 根节点包含所有代码 | (整个文件) |
ImportDeclaration | 进口报表 | import React from 'react' |
ExportDefaultDeclaration | 默认出口 | export default App |
VariableDeclaration | 可变声明 | const x = 1 |
FunctionDeclaration | 函数定义 | function foo() {} |
ArrowFunctionExpression | 箭头函数 | () => {} |
CallExpression | 函数调用 | foo() |
MemberExpression | 财产使用权 | obj.prop |
Identifier | 可变/功能名称 | myVariable |
JSXElement | JSX 标签 | <div>...</div> |
BlockStatement | 代码块 | { ... } |
ReturnStatement | 返回语句 | return value |
最佳做法
在与AST转型合作时,遵循这些准则:
- 测试 彻底- AST 变换可以有微妙的边界情况;写作全面的测试,并用各种编码模式进行测试,包括嵌入结构,注释,以及异常格式化。
- 处理错误 优雅-在尝试捕获时环绕转换,并在处理前验证输入
- 简单-在写入变换代码前先在 AST Explorer 中进行实验。在转换前始终要验证您对 AST 结构的假设
- 文档意图- AST代码可能很复杂;添加注释解释每个转换都做什么
进一步资源
- AST 探索器- 交互式AST可视化
- Babel插件手册- 深潜到 Babel插件中
- jscodeship-来自Facebook的高级编码工具箱
结论
AST解锁了远超正则表达式所能实现的强大的代码转换能力。虽然学习曲线更陡峭,但可靠性、精度和可维护性使得AST成为任何严肃的代码操作任务的专业选择。用简单的转换开始探索AST,你会很快发现它们如何自动重构任务,并确保整个代码库的一致性。